提交工单
咨询集成、功能及报价等问题
RoomKit provides different system integration solutions for different cases:
This document describes the implementation process based on the first scenario.
The system architecture:
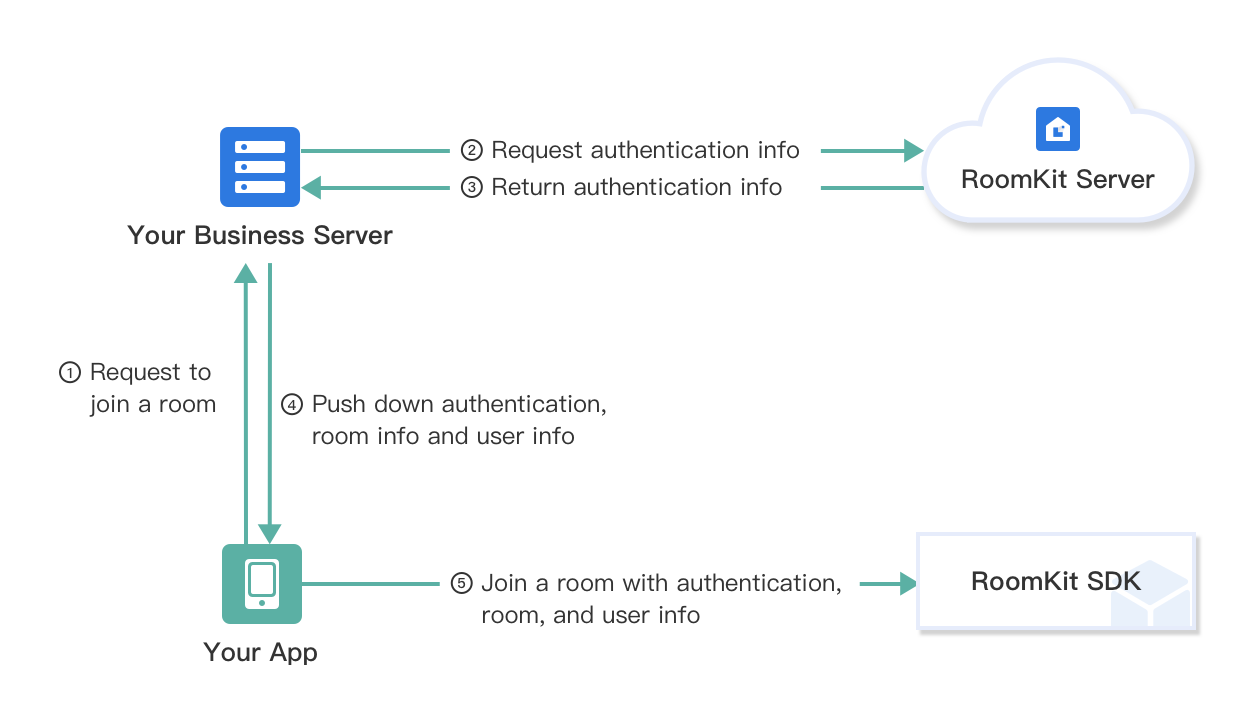)
In this system architecture, the following components need to be implemented by yourself:
Before you begin, make sure you complete the following steps:
The following flowchart shows the major steps to access the RoomKit service from your app client:
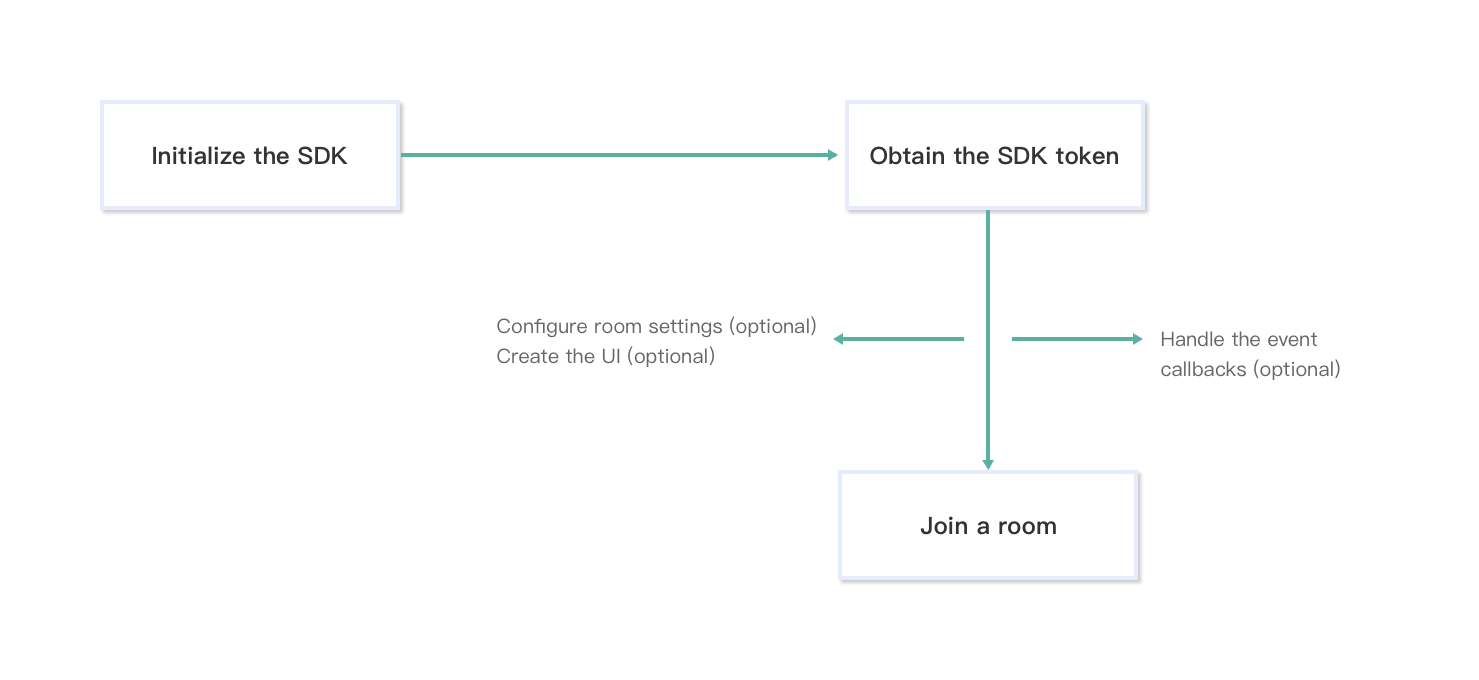)
You need to initialize the RoomKit SDK before using it.
ZegoInitConfig object with the SecretID you get from the RoomKit Admin Console.initWithConfig method initialize the SDK with the configuration object created in the above step.@interface ZegoInitConfig : NSObject
/// The SecretID is assigned by ZEGO
@property (nonatomic, assign) NSInteger secretID;
@end// Create a ZegoInitConfig instance
ZegoInitConfig *config = [[ZegoInitConfig alloc] init];
config.secretID = 123456; // Use the SecretID you get from RoomKit Admin Console
// Initialize the SDK
[[ZegoRoomKit sharedInstance] initWithConfig:config completion:^(ZegoRoomKitError error) {
}];Call the RoomKit server API Get SDK acess token to obtain the SDK access token, which is required for your app client to access the RoomKit service.
secret_id and secret_sign from RoomKit Admin Console.device_id by calling the deviceID method.To ensure system security, we recommend that you request the SDK access token from the RoomKit server through your business server.
You can set the language of room UI before join a room.
ZegoJoinRoomUIConfig object with the language setting. setUIConfig ethod to set up the UI with the configuration object created above.// Create and initialize a ZegoJoinRoomUIConfig object with language settings
ZegoJoinRoomUIConfig *uiconfig = [ZegoJoinRoomUIConfig new];
uiconfig.language = 2; // 2 for English
// Set up the UI using the above configuration
[[ZegoRoomKit sharedInstance].inRoomService setUIConfig:uiconfig];To join a room, you need the following information:
The user IDs and room IDs can be any 64-bit numeric values. But, you need to ensure user IDs and room IDs are unique within the scope of your project. Otherwise, data may get mixed up and users who share the same userID will kick out each other.
ZegoJoinRoomConfig object with the above information. joinRoomWithConfig method to join the room with the configuration object created in the above step./// Configuration for joining a room
///
@interface ZegoJoinRoomConfig : NSObject
/// Room ID
@property (nonatomic, copy) NSString *roomID;
/// Project ID
@property (nonatomic, assign) NSInteger productID;
/// SDK authentication token
@property (nonatomic, copy) NSString *token;
/// User name
@property (nonatomic, copy) NSString *userName;
/// User ID
@property (nonatomic, assign) NSInteger userID;
/// User role
@property (nonatomic, assign) ZegoRoomKitRole role;
@end// Create a configuration object
ZegoJoinRoomConfig *config = [ZegoJoinRoomConfig new];
config.roomID = @"123456789"; // Room ID
config.productID = 1234; // productID
config.userName = @"Anne"; // User name
config.userID = 123456789; // User ID
config.role = ZegoRoomKitRoleAttendee; // Join the room as an attendee
config.token = @"qwertyuiop"; // The SDK token obtained by calling the corresponding Server API
// Join the room
[[ZegoRoomKit sharedInstance].inRoomService joinRoomWithConfig:config
fromVC:fromVC
completion:^(ZegoRoomKitError errorCode) {
}];