提交工单
咨询集成、功能及报价等问题
Custom video pre-processing refers to processing the captured video with the AI Effects SDK for features such as face beautification, and stickers, this might be needed when the Video Call SDK does not meet your development requirements.
)
Compared to the custom video capture feature,
the custom video pre-processing does not require you to manage the device input sources, you only need to manipulate the raw data thrown out by the ZegoExpress-Video SDK, and then send it back to the ZegoExpress-Video SDK.
For more advanced features such as layer blending, we recommend you refer to the Customize how the video captures.
Before you begin, make sure you complete the following:
Create a project in ZEGOCLOUD Admin Console and get the AppID and AppSign of your project.
Refer to the Quick Start doc to complete the SDK integration and basic function implementation.
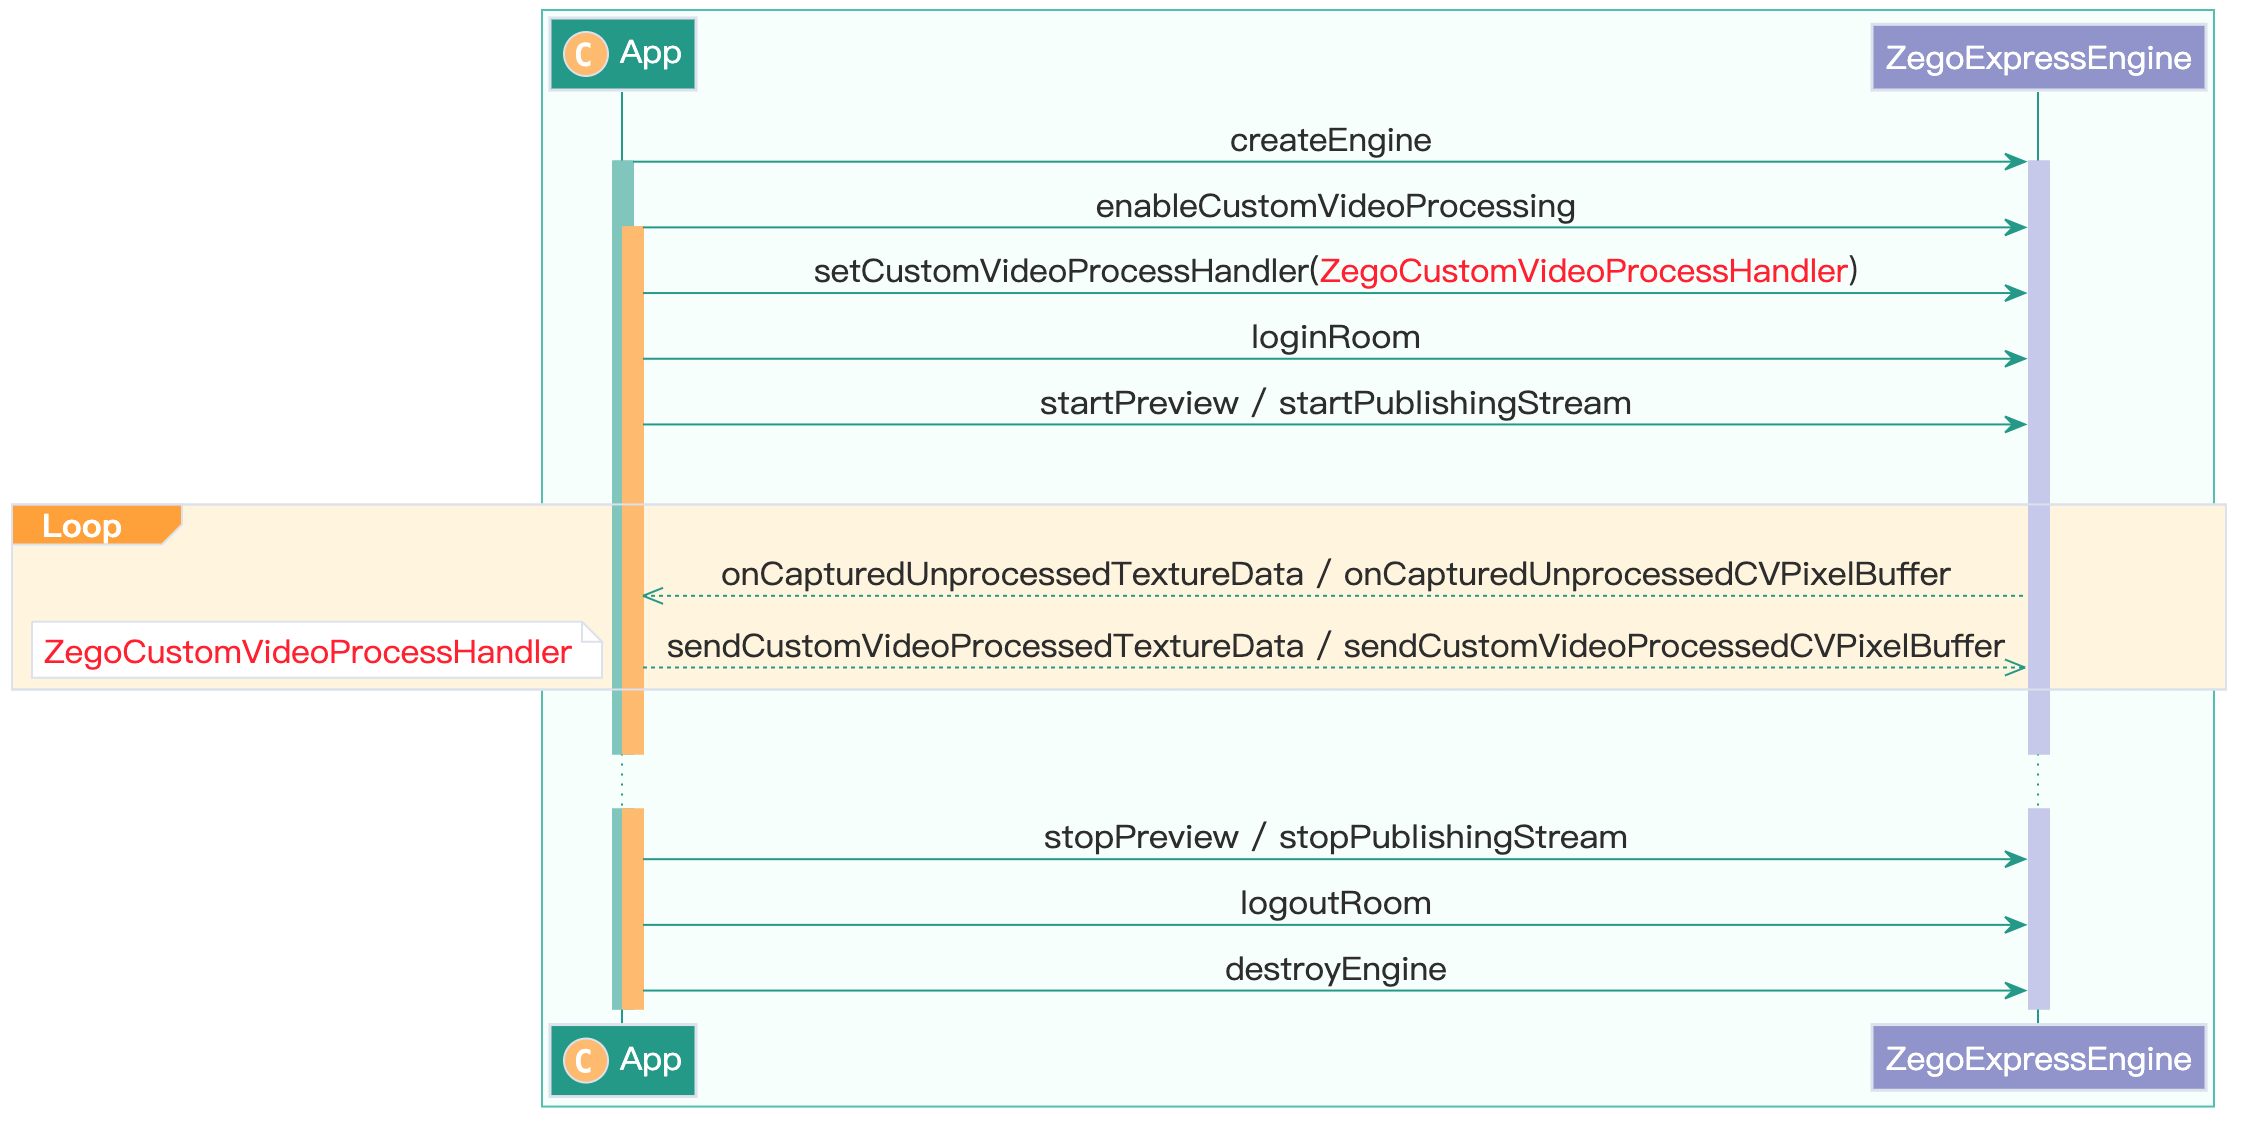
The following diagram shows the API call sequence of the custom video pre-processing (taking the ZegoVideoBufferType.GL_TEXTURE_2D type as a example):
)
ZegoCustomVideoProcessConfig object, and set the bufferType property for providing video frame data type to the SDK. The SDK supports multiple types of video data. You need to specify and inform the SDK of the buffer type you are using.
The following are the data types the SDK supports for now, setting other enumeration values will not take effect.
SurfaceTexture: When the value of the bufferType is ZegoVideoBufferType.SURFACE_TEXTURE.GLTexture2D: When the value of the bufferType is ZegoVideoBufferType.GL_TEXTURE_2D.enableCustomVideoProcessing method before starting the local video preview and the stream publishing starts.ZegoCustomVideoProcessConfig config = new ZegoCustomVideoProcessConfig();
// Select the [GL_TEXTURE_2D] type of video frame data.
config.bufferType = ZegoVideoBufferType.GL_TEXTURE_2D;
// Enable the custom video pre-processing feature.
express.enableCustomVideoProcessing(true, config, ZegoPublishChannel.MAIN);After the SDK gets the raw video data, it sends out notifications through the onCapturedUnprocessedTextureData callback, and then you can process the video using the Effects SDK.
The following sample code shows the key method calling steps:
// Get the raw video data using related event callbacks.
// Listen for and handle related event callback.
express.setCustomVideoProcessHandler(new IZegoCustomVideoProcessHandler() {
    ...

    // Receive texture from ZegoExpressEngine
    @Override
    public void onCapturedUnprocessedTextureData(int textureID, int width, int height, long referenceTimeMillisecond, ZegoPublishChannel channel) {


        ZegoEffectsVideoFrameParam param = new ZegoEffectsVideoFrameParam();
        param.format = ZegoEffectsVideoFrameFormat.BGRA32;
        param.width = width;
        param.height = height;

        // Process buffer by ZegoEffects
        int processedTextureID = effects.processTexture(textureID, param);

        // Send processed texture
        express.sendCustomVideoProcessedTextureData(processedTextureID, width, height, referenceTimeMillisecond);
    }
}